Hi everyone,
While using Courses App for Shopify, have you ever wondered, if there are ways to provide course access to your students without a need for them to purchase it first?
There are many cases, where that would be useful for your store. For example, you are currently in the process of migrating your existing courses and students from another LMS over to Shopify, and you don’t want to go through a hassle of making sure all you existing students have purchased these courses again. Plus, if they’ve already paid for it on another platform, you don’t want them to pay a double amount for it, right?
Another example is when you want to invite chosen people to partake in your course as a part of promotional program. You can take advantage of you Shopify shop feature called “Customer account invites”. This will allow you to send individual or bulk account invites to your customers who previously didn’t have one, and if they choose to activate their account, you can then provide course access to them. You can learn more about Customer account invites here.
Now, how many and what exactly are these ways of providing access to a course manually? There are two main solutions you can choose from:
1) You can create a manual order for the customer and mark it as paid for that particular course. In Shopify, You can create orders for your customers and send them invoices from the Shopify admin or the Shopify app. The orders that you create on behalf of your customers are named draft orders. Draft orders are similar to the orders that your customers create for themselves. A draft order is converted to an order when you accept payment for it.
Here is a step-by-step tutorial:
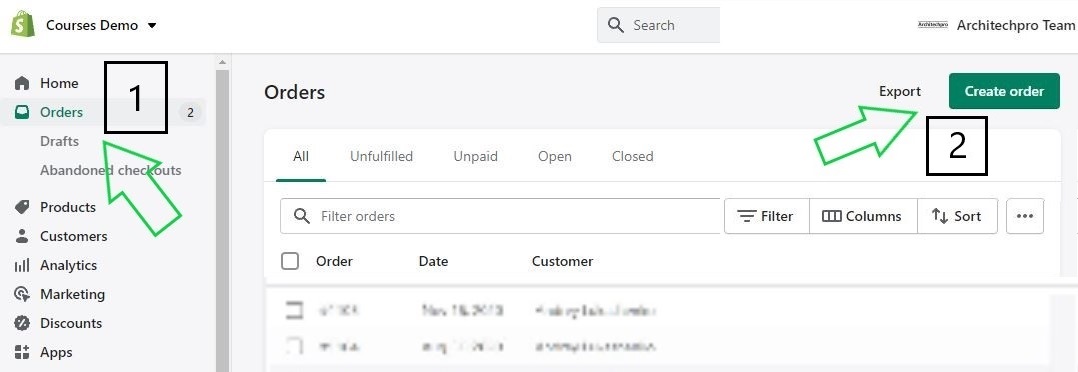
1. From your Shopify admin, go to Orders.
2. Click Create order.
3. Add Products to the order (specifically course products).
4. Customize the order:
- Add a customer.
- Apply discounts.
- Turn taxes on or off.
- Add tags or a note.
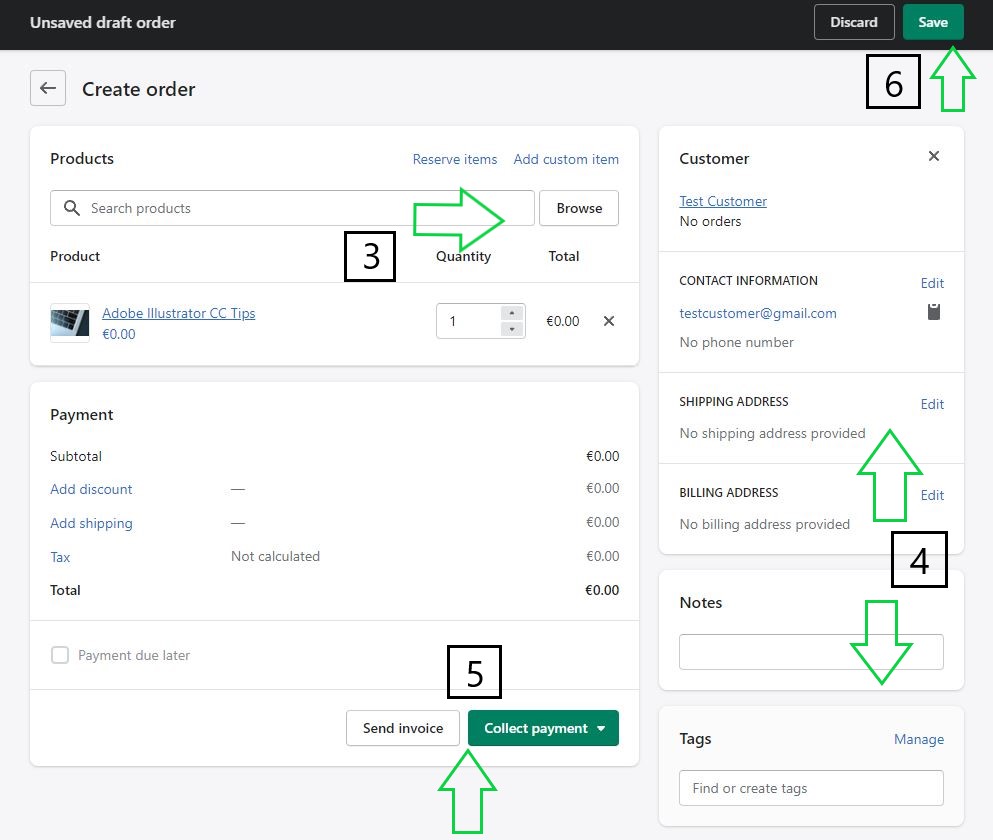
5. Do one of the following actions:
- Send an invoice to the customer. By default, the invoice contains a link to a checkout that your customer can use to pay for the order.
- Mark the order as paid from the dropdown menu in Collect payment, if you want to provide access to the product manually.
6. Save the order as a draft so that you can update it later from the Drafts page.
2) You can provide your customer with a 100% discount code, so they can make a normal purchase without the need to make a payment for that specific course. Here is a quick guide on how to make one:
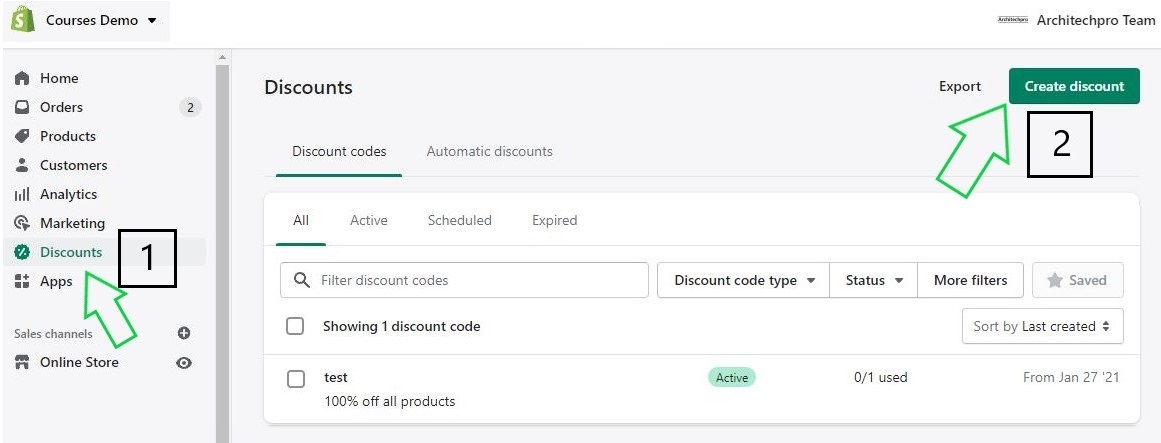
1. From your Shopify admin, go to Discounts.
2. Click Create discount, and then click Discount code.
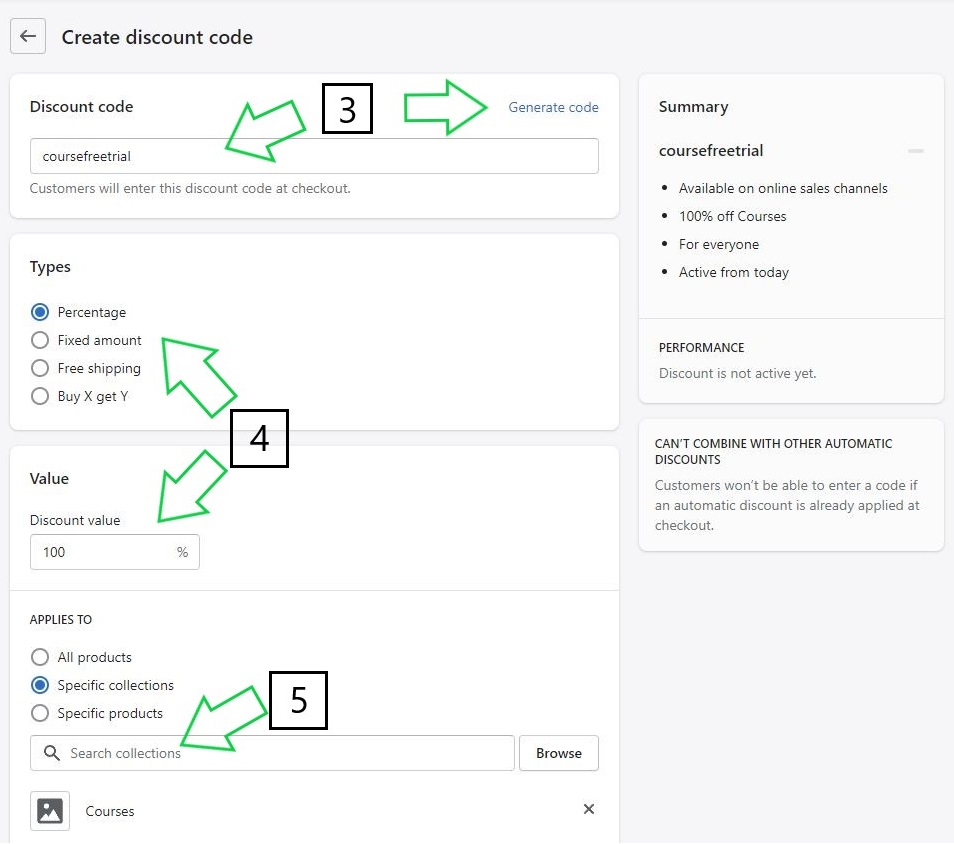
3. In the Discount code section, do either of the following:
- Enter a name for the new discount code, for example,
coursefreetrial. - Click Generate code.
4. In the Types section, do either of the following:
- Select Percentage, and then enter a percent value in the Value section (enter 100% if you want to provide course access for free).
- Select Fixed amount, and then enter a monetary value in the Value section.
5. If you want the discount to apply to specific collections or products, then in the Applies to section, do either of the following:
- Select Specific collections, check the appropriate collections, and then click Add.
- Select Specific products, check the appropriate products and/or variants, and then click Add.
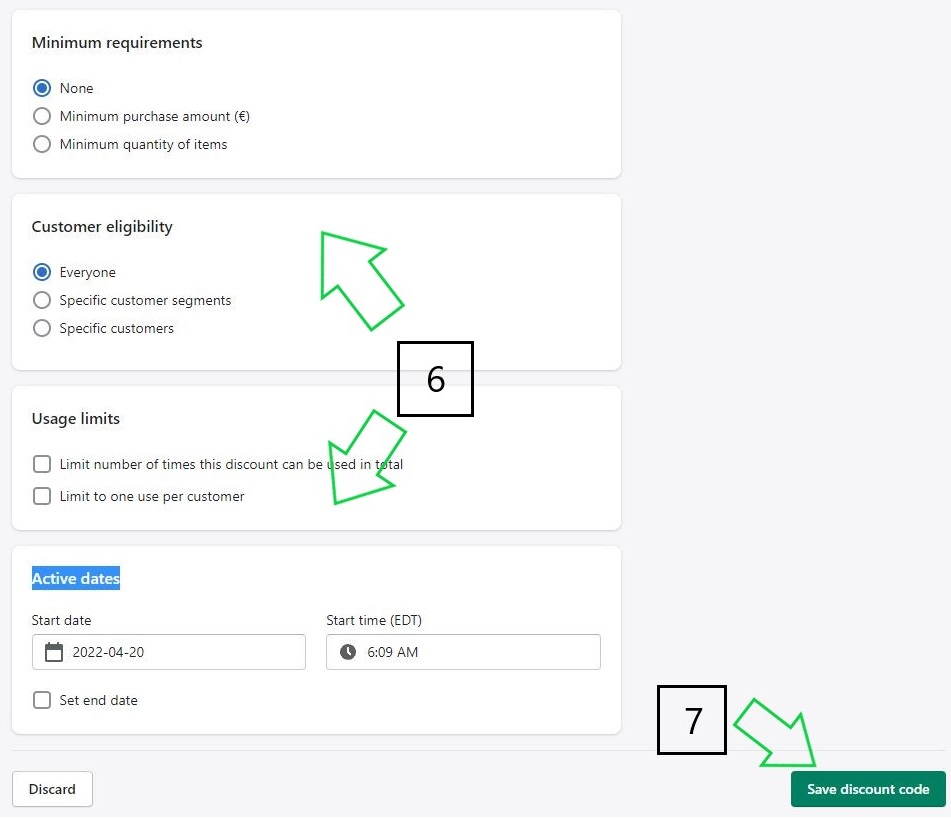
6. Apply Optional settings, such as: Minimum requirements, Customer eligibility, Usage limits and Active dates.
7. Click Save discount code.
3) Additionally, as previously mentioned, You may invite chosen students to create accounts in your store. Here are the steps to achieve it:
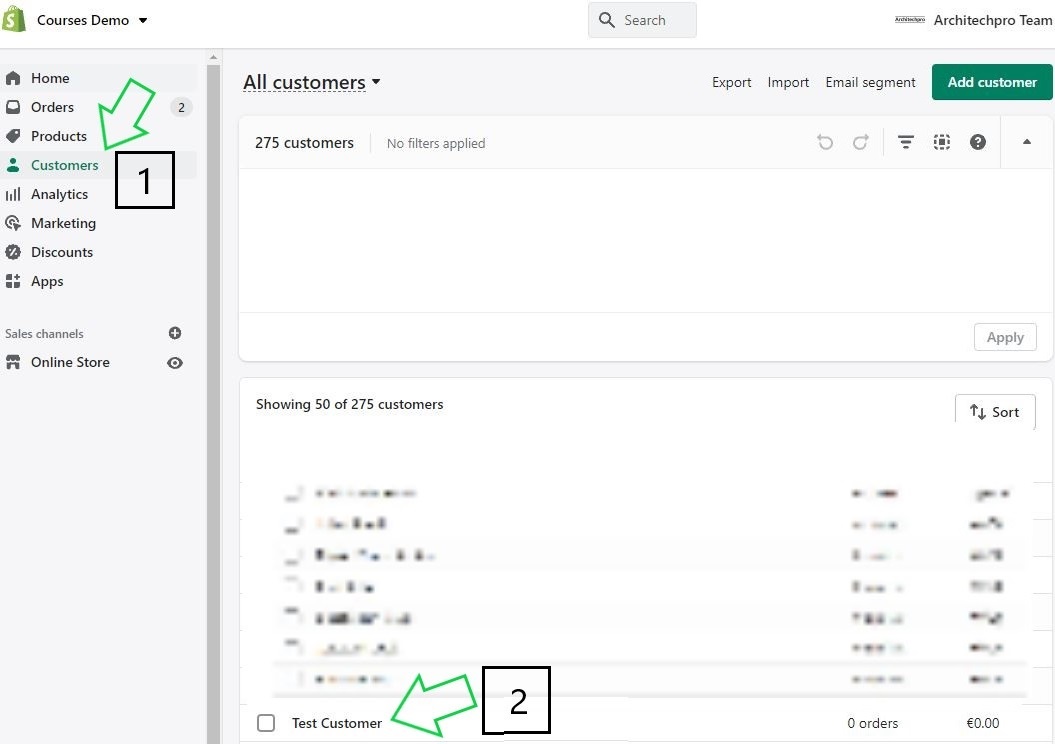
1. From your Shopify admin, go to Customers.
2. Click the name of the customer that you want to invite.
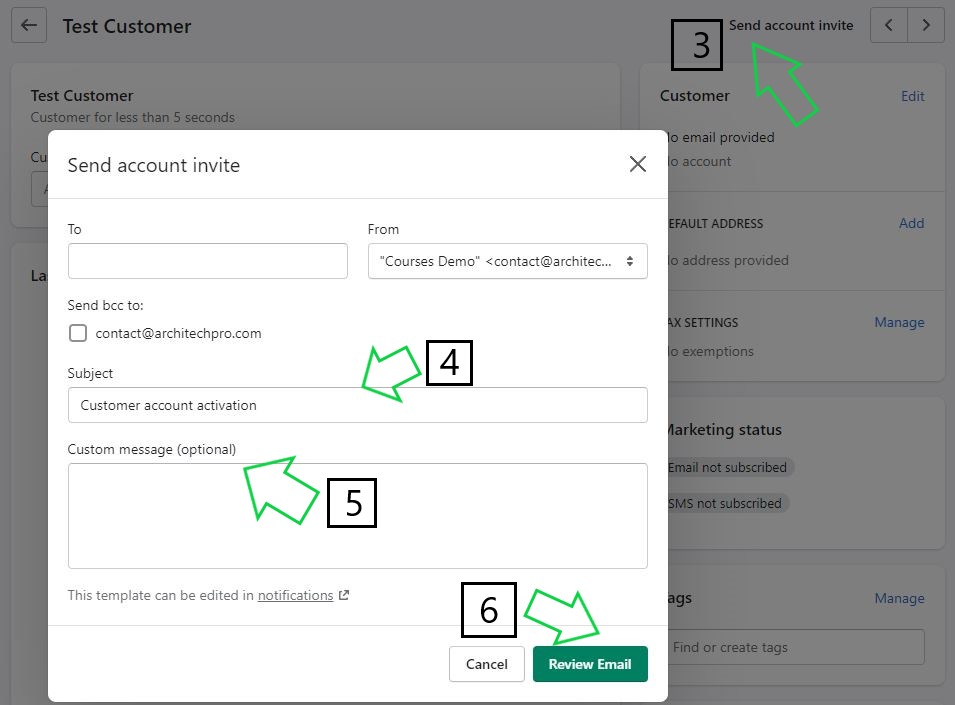
3. Click Send account invite.
4. Optional: Edit the content in the Subject box.
5. In the Custom message box, add a message for your customers. If you leave this box blank, then the default message is sent to the customer.
6. Click Review, and then click Send notification.
7. After the student proceeds through their account creation, you can provide course access to them manually with one of the methods described above.
All in all, these are some of the great instances of how Shopify provides many different ways for store owners to provide access for their digital products, including those created with a help of third-party apps. If you haven’t already, feel free to check out Courses app for Shopify for free.
And if you are not using Shopify yet, you can try it for free for 14 days using this link.
As usual, in case of any questions or suggestions feel free to contact us. Until next time, stay tuned, and enjoy creating new awesome products!